안녕하세요, 코린이의 코딩 학습기 채니 입니다.
개인 포스팅용으로 내용에 오류 및 잘못된 정보가 있을 수 있습니다.
axios
- 브라우저, Node.js를 위한 Promise API를 활용하는 HTTP 비동기 통신 라이브러리
https://cdnjs.com/libraries/axios
axios - Libraries - cdnjs - The #1 free and open source CDN built to make life easier for developers
Promise based HTTP client for the browser and node.js - Simple. Fast. Reliable. Content delivery at its finest. cdnjs is a free and open-source CDN service trusted by over 12.5% of all websites, serving over 200 billion requests each month, powered by Clou
cdnjs.com
HTML 코드
<button id="btn3">확인</button>
Javascript 코드
<script src="https://cdnjs.cloudflare.com/ajax/libs/axios/1.0.0-alpha.1/axios.min.js" integrity="sha512-xIPqqrfvUAc/Cspuj7Bq0UtHNo/5qkdyngx6Vwt+tmbvTLDszzXM0G6c91LXmGrRx8KEPulT+AfOOez+TeVylg==" crossorigin="anonymous" referrerpolicy="no-referrer"></script>

<script>
const USER_URL = "https://asia-northeast3-focal-elf-326215.cloudfunctions.net/user";

btn3.onclick = () => {
    axios(USER_URL)
        .then((response) => {
            console.log(response);
        })
};
fetch에서의 json() 작업이 필요 없이 바로 데이터를 추출할 수 있습니다.
btn3.onclick = () => {
    axios(USER_URL)
        .then((response) => {
            // console.log(response);
            const {id} = response.data;
            alert(`사용자의 아이디는 ${id}입니다.`);
        })
};
바로 data에 접근이 가능하므로 fetch보다 더 편리합니다.
랜덤 강아지 사진 추출
HTML 코드
<button id="btn4">Random Dog</button>
<div class="dogs pet-wrapper"></div>
CSS 코드
<style>
    .pet-wrapper {
        padding: 3px;
        border: 1px solid gray;
        height: 300px;
        margin: 10px 0;
        text-align: center;
        min-width: 300px;
        min-height: 300px;
        width: fit-content;
        height: fit-content;
    }
    .pet-wrapper img {
        width: 300px;
        transition-duration: 1s;
    }
</style>
Javascript 코드
btn4.onclick = () => {
    axios("https://dog.ceo/api/breeds/image/random")
        .then(({data}) => {
            loadDogImage(data);
        })
};

const loadDogImage = (data) => {
    const {message, status} = data;
    if(status === 'success') {
        const wrapper = document.querySelector(".dogs");
        const img = document.createElement("img");
        img.src = message;
        wrapper.innerHTML = '';
        wrapper.append(img);
    }
};
버튼을 클릭할 때마다 강아지 이미지가 나오는 것을 확인할 수 있습니다.
data에 바로 접근하여 매개인자로 넘겨주었습니다.
이번엔 3초 뒤에 이미지가 사라지게 해보겠습니다.
btn4.onclick = () => {
    axios("https://dog.ceo/api/breeds/image/random")
        .then(({data}) => {
            return loadDogImage(data);
        })
        .then((img) => img.remove())
};

const loadDogImage = (data) => {
    return new Promise((resolve) => {
        const {message, status} = data;
        if(status === 'success') {
            const wrapper = document.querySelector(".dogs");
            const img = document.createElement("img");
            img.src = message;
            img.onload = () => {
                setTimeout(() => {
                    resolve(img);
                }, 3000);
            }
            wrapper.innerHTML = '';
            wrapper.append(img);
        }
    })
};
버튼을 클릭한 후 3초 뒤에 이미지가 사라지는 것을 확인할 수 있습니다.
랜덤 고양이 사진 추출
HTML 코드
<button id="btn5">Random Cat</button>
<div class="cats pet-wrapper"></div>
CSS 코드 - 동일
Javascript 코드
axios.defaults.headers.common['x-api-key'] = "키값";
axios('https://api.thecatapi.com/v1/images/search', { params: { limit:1, size:"full" } })
    .then(response => console.log(response))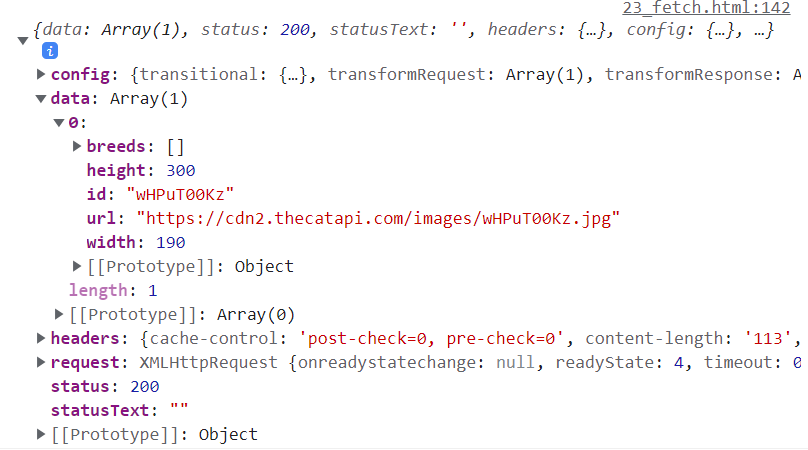
data 속성 안에서 배열 안에 url을 가져와 사용해야 합니다.
이번에도 함수의 매개인자로 data를 넘겨주겠습니다.
btn5.onclick = () => {
    axios.defaults.headers.common['x-api-key'] = "키값";
    axios('https://api.thecatapi.com/v1/images/search', { params: { limit:1, size:"full" } })
    .then(({data}) => loadCatImg(data))
};

const loadCatImg = (data) => {
    const [{url}] = data;
    console.log(url);

    const img = document.createElement("img");
    const wrapper = document.querySelector(".cats");
    img.src = url;
    wrapper.innerHTML = '';
    wrapper.append(img);
};
클릭할 때마다 고양이 사진이 나오는 것을 확인할 수 있습니다.
이번엔 opacity을 이용하여 3초 뒤에 이미지가 사라지도록 해보겠습니다.
btn5.onclick = () => {
    axios.defaults.headers.common['x-api-key'] = "키값";
    axios('https://api.thecatapi.com/v1/images/search', { params: { limit:1, size:"full" } })
    .then(({data}) => loadCatImg(data))
    .then((img) => {
        return new Promise((resolve) => {
            img.ontransitionend = () => {
                console.log('transition이 종료되었습니다.');
                resolve(img);
            };
            setTimeout(() => {
                img.style.opacity = 0;
            }, 3000);
        })
    })
    .then((img) => img.remove())
};

const loadCatImg = (data) => {
    return new Promise((resolve) => {
        const [{url}] = data;
        console.log(url);

        const img = document.createElement("img");
        const wrapper = document.querySelector(".cats");
        img.src = url;
        img.onload = () => resolve(img);
        wrapper.innerHTML = '';
        wrapper.append(img);
    })
};
3초 뒤에 opacity이 0이 되고, duration이 걸려있기 때문에 서서히 사라져보입니다.
또한 transition이 모두 끝나면 최종적으로는 이미지를 삭제해주었고, ontransitionend를 이용하여 transition 종료 여부를 확인하였고, 종료 되면 remove()메소드로 이미지를 최종적으로 삭제 하였습니다.
'JavaScript > JavaScript' 카테고리의 다른 글
| Javascript) async & await (await fetch, 랜덤 강아지/고양이 사진 추출) (0) | 2022.06.10 |
|---|---|
| fetch) fetch란? (Response.json(), 정보 추출하기) (0) | 2022.06.10 |
| Javascript) Promise (기본, setTimeout, Promise chain) (0) | 2022.06.03 |
| Javascript) 동기식 / 비동기식 - Timer API, DOM 관련 이벤트 처리, DOM 연속 (0) | 2022.06.02 |
| Javascript) 정규표현식(4) - 수량자(*, +, ?, {}), Look Around, 비밀번호 유효성 검사 (0) | 2022.05.31 |


