안녕하세요, 코린이의 코딩 학습기 채니 입니다.
[리액트를 다루는 기술]의 책을 참고하여 포스팅한 개인 공부 내용입니다.
리덕스 라이브러리 이해하기
리액트 없이 쓰는 리덕스
리덕스는 리액트에 종속되는 라이브러리가 아닙니다.
리액트에서 사용하려고 만들어졌지만, 실제로 다른 UI 라이브러리/프레임워크에서도 사용 가능합니다.
우선 리액트가 아닌 바닐라 자바스크립트와 함께 사용해보겠습니다.
Parcel로 프로젝트 만들기
parcel-bundler 설치
$ yarn global add parcel-bundler
# yarn global이 잘 설치되지 않는다면 npm install -g parcel-bundler로!
프로젝트 디렉터리 생성 후 package.json 파일 생성
$ mkdir vanilla-redux
$ cd vanilla-redux
# package.json 파일 생성
$ yarn init -y
index.html 파일 생성
<html>
    <body>
        <div>바닐라 자바스크립트</div>
        <script src="./index.js"></script>
    </body>
</html>
index.js 파일 생성
console.log('hello parcel');
개발용 서버 실행
$ parcel index.htmlhttp://localhost:1234/에 접속하면 아래와 같은 페이지가 나타납니다.
(파일 저장마다 자동으로 새로고침)

※ 아래와 같은 오류 발생하였는데, 터미널을 껐다켜고 parcel 재설치 등을 통해 해결
parcel : 'parcel' 용어가 cmdlet, 함수, 스크립트 파일 또는 실행할 수 있는 프로그램 이름으로 인식되지 않습니다. 이름이 정확한지 확인하고 경로가 포함된 경우 경로가 올바른지 검증한 다음 다시 시도하십시오.
npm: 'npm' 용어가 cmdlet, 함수, 스크립트 파일 또는 실행할 수 있는 프로그램 이름으로 인식되지 않
VSCode와 Node.js를 설치하고 간단한 프로젝트를 생성하기 위해 npm --version을 쳤는데 다음과 같은 오류가 발생VSCode의 기본 터미널이 powershell로 설정되어 있기 때문VSCode의 기본 터미널의 종류를 바꿔
velog.io
리덕스 모듈 설치
yarn add redux
간단한 UI 구성하기
index.css
.toggle {
    border: 2px solid black;
    width: 64px;
    height: 64px;
    border-radius: 32px;
    box-sizing: border-box;
}

.toggle.active {
    background: yellow;
}
index.html
<html>
    <head>
        <link rel="stylesheet" type="text/css" href="index.css" />
    </head>
    <body>
        <div class="toggle"></div>
        <hr />
        <h1>0</h1>
        <button id="increase">+1</button>
        <button id="decrease">-1</button>
        <script src="./index.js"></script>
    </body>
</html>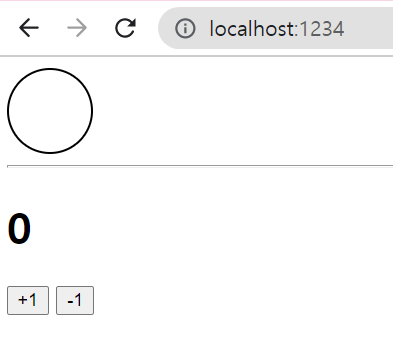
간단한 UI를 구성해보았습니다.
DOM 레퍼런스 만들기
UI를 관리할 때 별도 라이브러리를 사용하지 않으므로 DOM에 직접 접근하여 수정해야 합니다.
index.js
const divToggle = document.querySelector('.toggle');
const counter = document.querySelector('h1');
const btnIncrease = document.querySelector('#increase');
const btnDecrease = document.querySelector('#decrease');
액션 타입과 액션 생성 함수 정의
액션의 이름을 정의할 땐, 문자열 형태의 주로 대문자로 작성하며 고유해야 합니다.
index.js
const divToggle = document.querySelector('.toggle');
const counter = document.querySelector('h1');
const btnIncrease = document.querySelector('#increase');
const btnDecrease = document.querySelector('#decrease');

const TOGGLE_SWITCH = 'TOGGLE_SWITCH';
const INCREASE = 'INCREASE';
const DECREASE = 'DECREASE';
해당 액션 이름을 사용하여 액션 객체를 만드는 액션 생성 함수를 작성해주겠습니다.
액션 객체는 type 값을 반드시 갖고 있어야 합니다.
index.js
const divToggle = document.querySelector('.toggle');
const counter = document.querySelector('h1');
const btnIncrease = document.querySelector('#increase');
const btnDecrease = document.querySelector('#decrease');

const TOGGLE_SWITCH = 'TOGGLE_SWITCH';
const INCREASE = 'INCREASE';
const DECREASE = 'DECREASE';

const toggleSwitch = () => ({ type: TOGGLE_SWITCH });
const increase = difference => ({ type: INCREASE, difference });
const decrease = () => ({ type: DECREASE });
초깃값 설정
초깃값은 숫자, 문자열, 객체 등등 다양하게 정의해줄 수 있습니다.
index.js
const divToggle = document.querySelector('.toggle');
const counter = document.querySelector('h1');
const btnIncrease = document.querySelector('#increase');
const btnDecrease = document.querySelector('#decrease');

const TOGGLE_SWITCH = 'TOGGLE_SWITCH';
const INCREASE = 'INCREASE';
const DECREASE = 'DECREASE';

const toggleSwitch = () => ({ type: TOGGLE_SWITCH });
const increase = difference => ({ type: INCREASE, difference });
const decrease = () => ({ type: DECREASE });

// 초깃값 설정
const initialState = {
    toggle: false,
    counter: 0
}
리듀서 함수 정의
리듀서는 변화를 일으키는 함수로, 파라미터로는 state와 action 값을 받습니다.
index.js
const divToggle = document.querySelector('.toggle');
const counter = document.querySelector('h1');
const btnIncrease = document.querySelector('#increase');
const btnDecrease = document.querySelector('#decrease');

const TOGGLE_SWITCH = 'TOGGLE_SWITCH';
const INCREASE = 'INCREASE';
const DECREASE = 'DECREASE';

const toggleSwitch = () => ({ type: TOGGLE_SWITCH });
const increase = difference => ({ type: INCREASE, difference });
const decrease = () => ({ type: DECREASE });

const initialState = {
    toggle: false,
    counter: 0
};

// state가 undefined일 때는 initialState를 기본값으로 사용
function reducer(state = initialState, action) {
    // action.type에 따라 다른 작업 처리
    switch(action.type) {
        case TOGGLE_SWITCH:
            return {
                ...state, // 불변성 유지
                toggle: !state.toggle
            };
        case INCREASE:
            return {
                ...state,
                counter: state.counter + action.difference
            };
        case DECREASE:
            return {
                ...state,
                counter: state.counter - 1
            };
        default: return state;
    }
}
리듀서 함수가 맨 처음 호출될 때 state는 undefined입니다.
state가 undefined라면 기본값을 initialState로 설정해준 것을 확인할 수 있습니다.
또한, 불변성을 유지해야 하기 때문에 spread 연산자를 사용하므로, 리덕스의 상태는 최대한 깊지 않은 구조로 진행하는 것이 좋습니다.
만일 객체 구조가 복잡하거나 배열도 함께 사용하는 경우 immer를 사용하면 좋겠죠.
스토어 만들기
createStore 함수를 이용해 스토어를 만들어줍니다.
index.js
import { createStore } from "redux";

...
...

const store = createStore(reducer);
※ createStore 사용 시 취소선이 그어지는 경우, 아래 포스팅 참고
createStore가 이상합니다. - 코딩애플 온라인 강좌
npm remove redux react-redux 한 다음에 npm install redux@4.1.2 react-redux 합시다
codingapple.com
render 함수 만들기
상태가 업데이트될 때마다 호출되며, 이미 html을 사용하여 만들어진 UI의 속성을 상태에 따라 변경해줍니다.
index.js
...
...

const store = createStore(reducer);

const render = () => {
    const state = store.getState(); // 현재 state 불러오기

    // 토글 처리
    if(state.toggle) {
        divToggle.classList.add('active');
    } else {
        divToggle.classList.remove('active');
    }

    // 카운터 처리
    counter.innerText = state.counter;
};

render();
구독하기
스토어의 상태가 바뀔 때마다 생성한 render 함수가 호출되도록 해줍니다.
subscribe 함수를 통해 진행할 수 있고, 파라미터로 함수 형태의 값을 전달해줍니다.
전달된 함수는 추후 액션이 발생하여 상태가 업데이트될 때마다 호출됩니다.
index.js
...
...

const render = () => {
    const state = store.getState(); // 현재 state 불러오기

    // 토글 처리
    if(state.toggle) {
        divToggle.classList.add('active');
    } else {
        divToggle.classList.remove('active');
    }

    // 카운터 처리
    counter.innerText = state.counter;
};

render();
store.subscribe(render);
※ 현재는 subscribe를 사용하지만 리액트에서 리덕스를 사용할 땐 직접 사용하지 않을 예정
→ react-redux 라이브러리가 작업을 대신해주기 때문
액션 발생시키기
dispatch를 통해 액션을 발생시켜줍니다. (파라미터에는 액션 객체를 넣음)
index.js
...
...

divToggle.onClick = () => {
    store.dispatch(toggleSwitch());
}
btnIncrease.onClick = () => {
    store.dispatch(increase());
}
btnDecrease.onClick = () => {
    store.dispatch(decrease());
}'JavaScript > React' 카테고리의 다른 글
| React) 리덕스를 사용하여 리액트 애플리케이션 상태 관리하기 ① - 준비 과정 (0) | 2022.12.09 |
|---|---|
| React) 리덕스 라이브러리 이해하기 - 리덕스의 세 가지 규칙 (2) | 2022.11.29 |
| React) 리덕스 라이브러리 이해하기 - 개념 정리 (0) | 2022.11.29 |
| React) Context API - useContext, static contextType 사용하기 (0) | 2022.11.28 |
| React) Context API - 사용 이유, createContext, Consumer, Provider, 동적 Context 사용하기 (0) | 2022.11.28 |


